If you’ve reached this page, there’s a good chance you’ve typed 192.168.18.1 into your browser’s address bar — either because you’re trying to access your router settings, configure Wi-Fi, or fix a network problem. This guide explains everything you need to know about 192.168.18.1, from what it means to how to use it effectively.
Whether you’re a home user, small business owner, or IT professional, understanding how to manage your router through this IP address gives you full control over your network’s performance, privacy, and security.
1. What Is 192.168.18.1?
A Private IPv4 Address
192.168.18.1 is a private IP address defined by the Internet Assigned Numbers Authority (IANA) within the 192.168.0.0/16 range. Private IPs are non-routable on the public Internet — they’re used internally within homes, offices, or local area networks (LANs).
That means 192.168.18.1 is not a website or an Internet server; it’s an internal address used by routers or other gateway devices to manage and route local traffic.
Common Purpose
In most networks that use this address, 192.168.18.1 acts as the default gateway — the “door” between your private network and the outside Internet.
All the devices on your local network — laptops, phones, smart TVs, printers — connect through this gateway to reach the web.
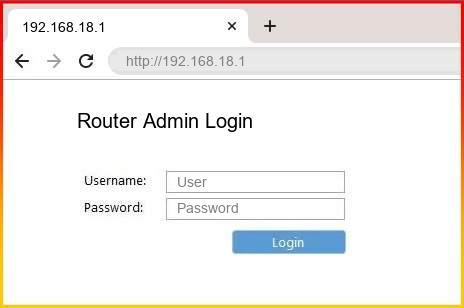
If you open a web browser and go to http://192.168.18.1, you’ll usually be directed to your router’s admin login page.
2. Why 192.168.18.1 and Not 192.168.0.1 or 192.168.1.1?
You might already be familiar with common router addresses like 192.168.0.1 or 192.168.1.1 — those are the defaults for brands like TP-Link, D-Link, and Netgear.
However, 192.168.18.1 is often used by less common brands, custom firmware, or ISP-provided routers. Some examples include:
- Routers supplied by local ISPs in Asia, Eastern Europe, and the Middle East
- Devices using modified firmware such as OpenWrt or DD-WRT
- Specialized gateways for IoT systems, point-to-point wireless devices, or mesh systems
It’s perfectly valid — it just means your router manufacturer or Internet provider has chosen this address as your default local gateway.
3. How to Log In to 192.168.18.1
Here’s a step-by-step guide to accessing your router’s admin panel via 192.168.18.1.
Step 1: Connect to the Network
Ensure that your computer, smartphone, or tablet is connected to the same router you’re trying to configure — either through Wi-Fi or an Ethernet cable.
If you’re on a mobile data connection or another Wi-Fi network, you won’t be able to reach the IP address.
Step 2: Open a Web Browser
Open your preferred browser — Chrome, Firefox, Edge, Safari, or Brave — and type:
http://192.168.18.1
Tip: Always use the address bar, not a search engine box.
Press Enter. If the router uses HTTPS, you can also try:
https://192.168.18.1
You should see a login screen asking for a username and password.
Step 3: Enter Login Credentials
Enter the admin credentials. If you haven’t changed them, try one of these common default combinations:
| Username | Password | Notes |
|---|---|---|
| admin | admin | Very common default |
| admin | password | Common on older routers |
| user | user | Basic user login |
| root | admin | For advanced firmware (e.g., DD-WRT) |
| admin | 1234 | Occasionally used by ISPs |
| (blank) | admin | Some use no username |
If none of these work, check:
- The router’s label (usually printed underneath)
- The manual or quick start guide
- Your ISP’s support website
If you’ve changed the password and forgotten it, don’t worry — see the reset section below.
4. Understanding the Router Dashboard
Once logged in at 192.168.18.1, you’ll see your router’s administrative dashboard. This is where you control everything about your home or office network.
While layouts vary by manufacturer, most dashboards include similar sections:
a. Status / Overview
Displays basic info such as:
- Internet connection type (Dynamic, PPPoE, Static)
- WAN IP address
- LAN IP address (192.168.18.1)
- Connected devices
- Firmware version
- System uptime
b. Network Settings
Here you can:
- Change the LAN IP address (e.g., 192.168.18.1 → 192.168.0.1)
- Modify the DHCP range (e.g., 192.168.18.100–192.168.18.200)
- Set static IPs for specific devices
- Configure DNS servers (e.g., Google DNS: 8.8.8.8)
c. Wireless Settings (Wi-Fi)
One of the most frequently accessed areas.
You can:
- Change the Wi-Fi name (SSID)
- Set or change your Wi-Fi password (read this guide from Norton)
- Choose security protocols (WPA2, WPA3)
- Adjust Wi-Fi channels or bandwidth (2.4 GHz / 5 GHz)
- Enable guest networks
d. Security & Firewall
Protect your network by:
- Enabling or disabling the firewall (see Dell)
- Blocking unwanted IPs or MAC addresses
- Setting up parental controls
- Limiting admin access to specific devices
e. Port Forwarding / NAT / DMZ
If you run online games, CCTV cameras, or local servers, you’ll need to open or forward certain ports. This section allows you to:
- Forward ports (e.g., 80, 443, 3389)
- Set up a DMZ (demilitarized zone) for exposed devices
- Manage NAT settings
f. System Administration
Here you can:
- Change the admin username/password
- Update firmware
- Backup or restore configurations
- Reboot or reset the router
- Schedule automatic reboots
5. Changing the Admin Password (Highly Recommended)
One of the first things you should do after logging in to 192.168.18.1 is to change your admin password.
Default credentials are public and can easily be found online. If left unchanged, anyone connected to your Wi-Fi network could access your router’s settings.
To change the password:
- Go to Administration or Management
- Find Password or Access Control
- Enter the old password, then create a strong new one
- Save the settings
Use a mix of letters, numbers, and special characters — e.g. H0meNet!2025.
6. How to Change Wi-Fi Name (SSID) and Password
To personalize your network and keep it secure:
- Log in to
192.168.18.1 - Navigate to Wireless Settings
- Under SSID, type your preferred network name (e.g., “MacPherson_WiFi”)
- Choose WPA2-PSK or WPA3-Personal for encryption
- Enter a strong password (e.g.,
StaySecure!2025) - Save or apply changes
Your devices will temporarily disconnect while the router restarts the wireless service. Reconnect using the new credentials.
7. How to Reset Your Router (When You’re Locked Out)
If you’ve lost your router password or can’t access 192.168.18.1, resetting is often the only option.
Physical Reset Method
- Locate the reset button (usually a small hole at the back).
- With the router powered on, press and hold it using a pin or paperclip for 10–30 seconds.
- Wait until the LED lights blink or the router restarts.
Afterward:
- All settings (Wi-Fi name, password, IP, etc.) return to factory defaults.
- You can log in again at
192.168.18.1using the default credentials.
8. Troubleshooting Access to 192.168.18.1
Sometimes you can’t open the router login page or the browser times out.
Here’s how to fix that.
1. Check Connectivity
Make sure you’re connected to the router’s network. Try opening another local IP like 192.168.18.100 (your own device). If you can’t connect, your Wi-Fi or Ethernet might be disconnected.
2. Verify the Gateway Address
It’s possible your router doesn’t use 192.168.18.1 at all.
To find out:
Windows:
- Press
Win + R, typecmd, hit Enter - Type
ipconfig - Look for “Default Gateway” — that’s your router’s address
Mac/Linux:
- Open Terminal
- Type
netstat -nr | grep default
orip route | grep default
If it shows 192.168.0.1 or something else, use that instead.
3. Clear Browser Cache
Browser caching can sometimes prevent login pages from loading properly. Clear cache or try Incognito/Private mode.
4. Disable VPN or Proxy
VPNs can override local routing. Disconnect your VPN and retry.
5. Use a Wired Connection
If Wi-Fi is unstable or misconfigured, connect a laptop directly via Ethernet cable to the router.
6. Restart the Router
A simple reboot can fix routing glitches. Power off for 30 seconds, then power on again.
7. Reset if All Else Fails
If none of the above work, perform a factory reset as described earlier.
9. Advanced Configuration Options
Once you’ve mastered the basics, you can use 192.168.18.1 to fine-tune your network.
a. DHCP Settings
You can customize how IP addresses are assigned:
- Change lease time
- Reserve IPs for specific MAC addresses
- Disable DHCP (if using another DHCP server)
Example:
Start IP: 192.168.18.100
End IP: 192.168.18.200
Lease Time: 24 hours
b. DNS Configuration
You can set your own DNS for faster or more private browsing:
- Google DNS: 8.8.8.8 / 8.8.4.4
- Cloudflare DNS: 1.1.1.1 / 1.0.0.1
- Quad9 DNS: 9.9.9.9
This overrides your ISP’s DNS, which can improve speed and privacy.
c. MAC Filtering
Control which devices can connect to your network by adding their MAC addresses to an allow or deny list.
d. QoS (Quality of Service)
Prioritize important traffic like video calls or gaming to reduce lag and buffering.
You can:
- Assign higher priority to specific IPs (e.g., your work laptop)
- Limit bandwidth for low-priority devices
e. Parental Controls
Block certain websites, restrict device access times, or filter content categories.
10. Security Best Practices for 192.168.18.1 Networks
Keeping your network secure is essential. Here’s a checklist:
- Change the default login password immediately.
- Update firmware regularly to patch vulnerabilities.
- Disable WPS (Wi-Fi Protected Setup) — it’s often insecure.
- Use WPA2 or WPA3 encryption (never WEP).
- Hide your SSID if you want an extra layer of obscurity.
- Enable firewall protection and intrusion detection if available.
- Disable remote management unless necessary.
- Limit access to the admin page by MAC or IP address.
- Backup settings regularly to restore in case of reset.
- Use strong Wi-Fi passwords (12+ characters, mix of letters/numbers/symbols).
11. Changing the Default IP Address (Optional)
You can change your router’s LAN IP from 192.168.18.1 to another address if desired.
Reasons to do this include:
- Avoiding IP conflicts with another router
- Creating separate subnets
- Enhancing security through obscurity
Example change:
- Old IP: 192.168.18.1
- New IP: 192.168.50.1
After saving, your browser must use the new address to access the admin page.
12. Backing Up and Restoring Configurations
Before performing firmware upgrades or major changes, always backup your router configuration.
To back up:
- Go to System Settings → Backup/Restore
- Click Backup
- Save the
.cfgfile somewhere safe
To restore:
- Go to the same page
- Choose Restore
- Select your saved file
- Reboot if prompted
13. Updating Router Firmware
Router firmware controls how your device functions. Outdated firmware can expose security vulnerabilities or cause performance issues.
To update:
- Download the latest firmware from your router manufacturer’s website.
- Log in to
192.168.18.1. - Go to Administration → Firmware Upgrade.
- Upload the file and follow on-screen instructions.
- Don’t power off the router during the process.
After completion, reboot and verify the version number.
14. Managing Connected Devices
Through 192.168.18.1, you can view and control all devices connected to your network.
Look under Device List / Connected Clients — you’ll typically see:
- Hostname (e.g., John-Laptop, iPhone-Hannah)
- IP address (192.168.18.x)
- MAC address
- Connection type (wired or wireless)
You can:
- Block unauthorized devices
- Rename known devices
- Assign static IPs for stability
This feature is especially useful to identify freeloaders using your Wi-Fi.
15. Port Forwarding Example (for Gaming or CCTV)
Say you have a CCTV DVR that needs remote access.
- Find the DVR’s local IP (e.g., 192.168.18.150).
- Log in to the router (
192.168.18.1). - Go to Port Forwarding / Virtual Server.
- Add a rule:
- External Port: 8080
- Internal IP: 192.168.18.150
- Internal Port: 80
- Protocol: TCP
- Save and reboot.
Now, when you access your public IP on port 8080, traffic will be forwarded to the DVR.
16. Setting Up a Guest Network
A guest network allows visitors to use your Internet connection without accessing your main network.
To set it up:
- Go to Wireless → Guest Network
- Enable guest SSID (e.g., “Guest_WiFi”)
- Set a simple password
- Restrict access to local network resources
- Save changes
Guests will now connect safely without seeing your shared devices.
17. IP Conflicts and How to Fix Them
If two devices share the same IP (e.g., both 192.168.18.10), you’ll experience “IP conflict” errors.
To fix:
- Reboot both devices (DHCP will reassign unique IPs)
- Or manually assign unique static IPs within the same subnet, e.g.
Device A → 192.168.18.10
Device B → 192.168.18.11
18. When to Contact Support
If you’ve tried everything and still can’t:
- Access
192.168.18.1 - Connect to the Internet
- Save settings that persist
- Or if your router won’t boot
Then contact your ISP or the router manufacturer’s support.
Provide them with:
- Router model and firmware version
- LED status
- What troubleshooting you’ve already done
They can guide you through advanced recovery steps.
19. Quick Reference Commands (for Power Users)
Windows
ipconfig /all
ping 192.168.18.1
tracert 8.8.8.8
Mac/Linux
ifconfig
ping 192.168.18.1
netstat -rn
These commands help diagnose IP configuration and network connectivity issues.
20. Example Small Office Setup Using 192.168.18.1
| Device | IP Address | Function |
|---|---|---|
| Router | 192.168.18.1 | Gateway |
| NAS Server | 192.168.18.10 | File storage |
| Desktop 1 | 192.168.18.20 | Admin workstation |
| Laptop | 192.168.18.21 | Employee device |
| Printer | 192.168.18.30 | Shared printer |
| Guest Wi-Fi | 192.168.50.1 (VLAN) | Isolated guest access |
This structure keeps main devices and guests separate, ensuring stability and security.
21. Best Practices for Network Health
- Restart router monthly to clear memory and maintain performance.
- Keep firmware current.
- Monitor traffic usage via 192.168.18.1 dashboard.
- Use surge protection to prevent hardware damage.
- Document network settings — IP ranges, passwords, and configs.
- Schedule backups for router configurations.
22. Frequently Asked Questions (FAQ)
Q1: Is 192.168.18.1 a public IP?
No. It’s a private IP, only accessible from inside your local network.
Q2: Why won’t 192.168.18.1 open?
Either your device isn’t on the same network, your router uses a different IP, or there’s a configuration issue.
Q3: Can I change 192.168.18.1?
Yes. Most routers allow you to change the LAN IP address. Doing so can help avoid conflicts with other routers on the same network or improve network segmentation. If you change the IP, remember to update the DHCP range and reconnect devices using the new gateway address.
Q4: How do I recover my router password if I forgot it?
If default credentials don’t work and you’ve lost your custom password, the only solution is typically a factory reset. Press and hold the reset button on the router for 10–30 seconds. After the router reboots, log in with default credentials and set a new password.
Q5: Is it safe to leave the default IP and credentials?
No. Leaving 192.168.18.1 with default credentials exposes your network to unauthorized access, especially if devices connect via Wi-Fi or physical access is possible. Always update passwords and monitor connected devices.
23. Securing Your 192.168.18.1 Router Network
Security is critical. Here’s a structured approach to harden your network:
a. Strong Admin Credentials
- Change both username and password immediately.
- Use at least 12 characters, including uppercase, lowercase, numbers, and symbols.
b. Secure Wi-Fi
- Enable WPA2 or WPA3 encryption.
- Avoid WEP; it’s obsolete and easily hacked.
- Hide the SSID if desired, though this provides only marginal security.
c. Disable Remote Management
Unless necessary, disable WAN-side access to the admin panel. Remote management increases the risk of hacking.
d. Regular Firmware Updates
Manufacturers patch vulnerabilities regularly. Check 192.168.18.1 → Administration → Firmware Update monthly or set auto-updates if supported.
e. Guest Networks
Set up a separate SSID for guests. This isolates your primary network from potentially insecure devices.
f. Firewall and Port Control
- Enable the firewall.
- Open only the necessary ports for applications like gaming or VPN.
- Avoid DMZ unless absolutely required.
g. Monitor Connected Devices
Regularly review the connected devices list to identify unauthorized users.
24. Optimizing Your Network via 192.168.18.1
Proper router configuration ensures faster, more reliable connectivity. Here’s how to optimize:
a. Wi-Fi Channel and Bandwidth
- Use 2.4 GHz for range, 5 GHz for speed.
- Choose the least crowded channel to reduce interference (use apps like Wi-Fi Analyzer).
b. Quality of Service (QoS)
Prioritize traffic such as:
- Video calls
- Online gaming
- Streaming
This ensures important applications get enough bandwidth.
c. DHCP Reservation
Reserve IP addresses for key devices to prevent IP conflicts:
- Printers, NAS, CCTV systems, or workstations.
d. Reduce Latency
- Disable unnecessary services (UPnP, WPS, remote admin).
- Avoid overlapping networks with neighboring routers.
25. Troubleshooting Common Issues
Even with 192.168.18.1 properly configured, problems can occur. Here’s a troubleshooting checklist:
- Cannot reach 192.168.18.1
- Verify you are on the correct network.
- Check your device’s IP is in the same subnet (e.g., 192.168.18.x).
- Try a wired connection.
- Login fails
- Ensure correct username/password.
- Clear browser cache or try a different browser.
- Perform a router reset if necessary.
- Slow internet or high latency
- Check connected devices consuming bandwidth.
- Adjust QoS to prioritize critical traffic.
- Change Wi-Fi channels to avoid interference.
- IP conflicts
- Assign static IPs for key devices.
- Extend DHCP range to accommodate all devices.
- Wi-Fi disconnects
- Verify firmware is up to date.
- Check router placement (avoid walls, metal, and interference sources).
- Change the Wi-Fi channel.
26. Small Business or Office Setup Using 192.168.18.1
A small office network can benefit from thoughtful configuration:
- Router IP: 192.168.18.1 (Gateway)
- LAN subnet: 192.168.18.0/24
- DHCP range: 192.168.18.100–192.168.18.200
- Static IPs for: NAS (192.168.18.10), Printer (192.168.18.20), VoIP phone (192.168.18.30)
- Guest Wi-Fi VLAN: 192.168.50.0/24
- Firewall rules: Restrict guests from accessing LAN devices
- QoS: Prioritize VoIP and video conferencing
This structure ensures network stability, security, and efficient resource allocation.
27. Advanced Settings and Features
VLANs (Virtual LANs)
- Segment your network for security or departmental separation.
- Example: Staff network 192.168.18.x, Guest network 192.168.50.x
VPN Setup
- Many routers support VPN servers or clients.
- Use VPN to secure remote access to your network.
Port Forwarding & DMZ
- Use port forwarding for gaming, CCTV, or web servers.
- DMZ should be used cautiously; it exposes devices to the Internet.
Monitoring and Logging
- Enable system logs for security audits.
- Monitor device connections for unauthorized access.
28. Maintenance Tips
- Monthly reboots: Keeps router memory fresh.
- Firmware updates: Patch vulnerabilities.
- Backups: Save router configurations regularly.
- Check connected devices: Identify new or rogue devices.
- Inspect cables and Wi-Fi coverage: Ensure stable connectivity.
29. When to Contact Support
Contact your ISP or router manufacturer if:
- 192.168.18.1 is unresponsive after reset.
- Firmware update fails or bricks the router.
- Devices cannot access the Internet despite correct settings.
- Security breaches occur despite proper configuration.
Provide details: model number, firmware version, LED status, and attempted troubleshooting.
30. Summary
192.168.18.1 is a private, non-routable IP address commonly used as a router’s default gateway. Accessing this address allows you to:
- Configure Wi-Fi and LAN settings
- Change default admin passwords
- Enable security features like firewall, MAC filtering, and guest networks
- Update firmware
- Monitor connected devices
- Optimize network performance
Key Takeaways:
- Always change default credentials.
- Keep firmware updated for security.
- Monitor and manage connected devices.
- Configure DHCP, static IPs, QoS, and port forwarding carefully.
- Use 192.168.18.1 responsibly to secure your home or office network.
By following this guide, you can take full control of your network, troubleshoot problems, and maintain security for all devices connected to 192.168.18.1.
Also, check out guide for 10.0.0.0.1 and 192.168.l00.1.